How to Style Gravity Forms
How to Style Gravity Forms
In Part One of our Gravity Forms series, you learned how to install Gravity Forms and create your first form.
Part Two of our series will show you how to use the Gutenberg block editor to add the form to a post or page. And you’ll learn how to style your Gravity Form.
Part Three of our Gravity Forms Series shows you a few advanced tips such as spam prevention, PayPal redirects, and troubleshooting form notifications.
Can I Still Use Shortcodes?
Prior to Gutenberg, adding a Gravity Form to a post or page was done through shortcodes.
And adding shortcodes is still possible to do through the Gutenberg shortcode block. But you won’t be able to see what it looks like in the editor and it will be more difficult to modify.
That’s because you won’t have a settings panel so you’ll need to make all of your adjustments in the short code directly.
Please note this post assumes that you are using Gutenberg, the new block editor for WordPress.
And that’s also why I highly recommend and will only be demonstrating how to install the Gravity Forms Gutenberg Block.
How to Add a Gravity Form Block
First create a new post or page.
And then add a Gravity Form Gutenberg Block to that post or page.
Take a look at this quick demo to see just how simple it is to do:

And if you’re still using the Classic Editor, the tutorial below explains how to use the classic editor to add Gravity Forms to WordPress using shortcodes:
Watch the Video Tutorial
Preview Your Post or Page
Here is what our page looks like regardless of whether you used the classic editor shortcodes or Gutenberg block editor:
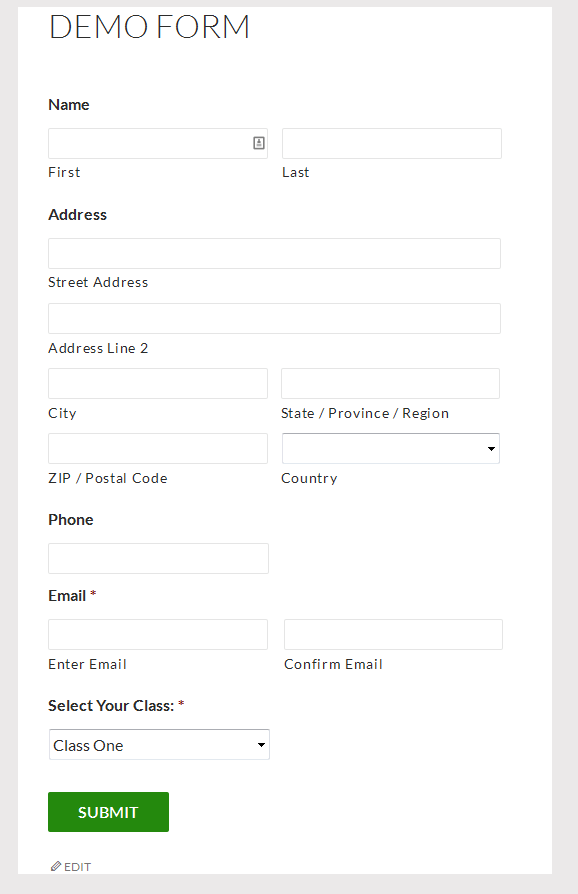
So you see how easy it is to add your form.
Now the default look of the form isn’t too bad, but maybe you want the form to have some color and style.
How to Style Gravity Forms
To style a Gravity Form, you need to apply some simple CSS to the elements of the form.
There are several ways you can add custom CSS to your site but the easiest is to go to Appearance > Customize > Additional CSS and add the code there.
The first thing you need to do is decide which elements you want to style. In our sample form, let’s style the field labels. In order to target that element, we’ll need to find its name.
Gravity Forms documentation has done a good job of showing us what the element names are and how to target those elements.
Reviewing that documentation, we are able to find the standard gravity form label we want to style.
In our example, I am using the default Twenty Fourteen theme.
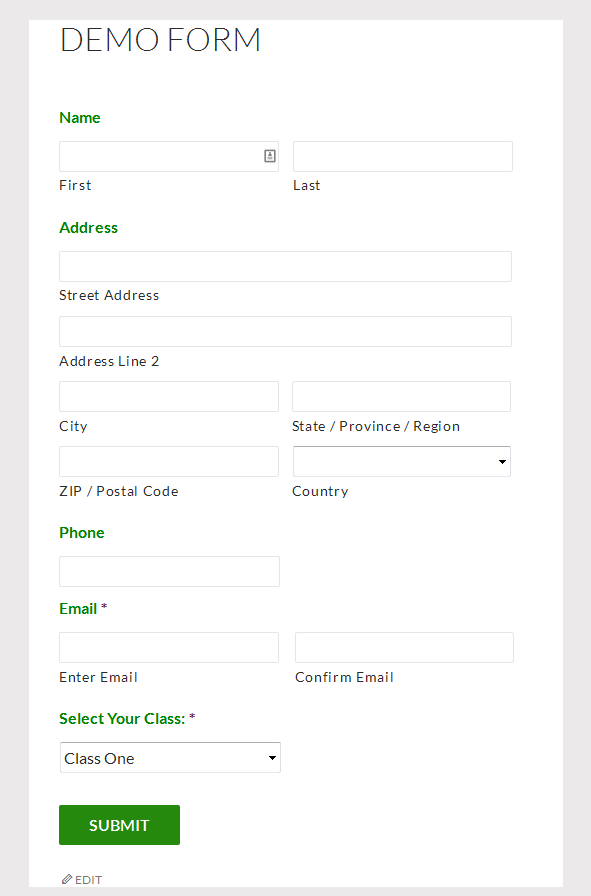
So let’s say I want to match the default green that is part of the form. I can choose either basic green color or it’s corresponding hex color value.
The following 2 code snippets will work the same. The difference is using a hex value vs. the actual color name.
body #gform_wrapper_4 .gform_body .gform_fields .gfield .gfield_label {color: #008000;}
OR
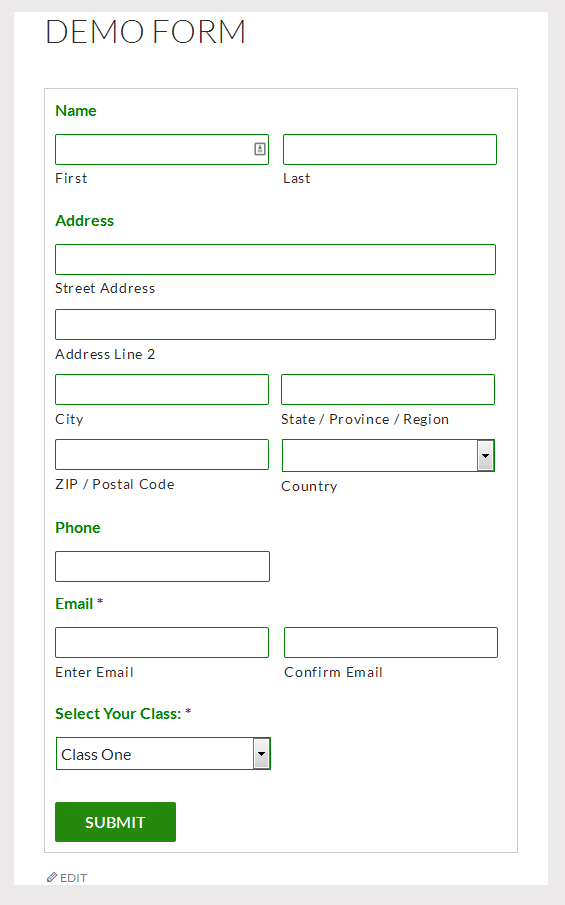
By adding the above code as custom CSS and saving my page, the form now has green labels and looks like this:
To continue styling this form, I will add styles to put a green border around the input text boxes and the drop down box.
I will also add a style to put a solid, 1-pixel light gray border around the entire form.
Finally, I will add some padding between the form’s border and input boxes using the following CSS:
body #gform_wrapper_4 {border: 1px solid #ccc;padding-left: 10px;padding-right: 10px;}
body #gform_wrapper_4 .gform_body .gform_fields .gfield input[type=text] {border: 1px solid #008000;}
body #gform_wrapper_4 .gform_body .gform_fields .gfield select {border: 1px solid #008000;}
body #gform_wrapper_4.gform_body .gform_fields .gfield textarea {border: 1px solid #008000;}
After applying these styles, here is what our sample form looks like:
You can easily target the font elements such as font-family and font-style as well as any of the other form elements.
As mentioned earlier, you might want to check out Gravity Form’s CSS targeting examples to see additional code samples.
So hopefully by now you have a basic understanding of how to style your Gravity form.
Adding Sections to Your Gravity Form
Some forms require collection of lots of information. You can easily add sections with page breaks to your Gravity Form, and show your user a progress bar as they complete the form.
To add a section, you must go back into the Gravity Form editor and select the “Section” element from the Standard Fields list:
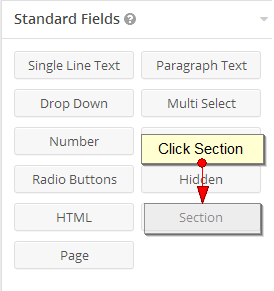
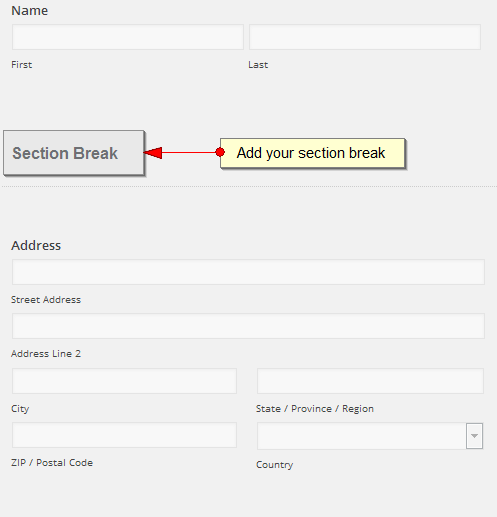
This will add a section break to the bottom of your form. Simply drag the section break and place it where it’s needed.
Or you can drag the section element from Standard Fields and place it directly where you want it:
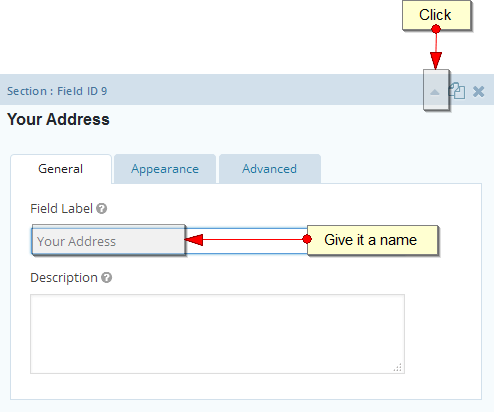
Then click the drop down to update the settings and give the section break a good name:
Adding Page Breaks to Your Form
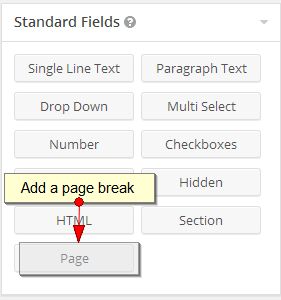
Next, add a page break field.
Drag and drop the Start Paging and Page Break elements as needed to create the necessary pages:
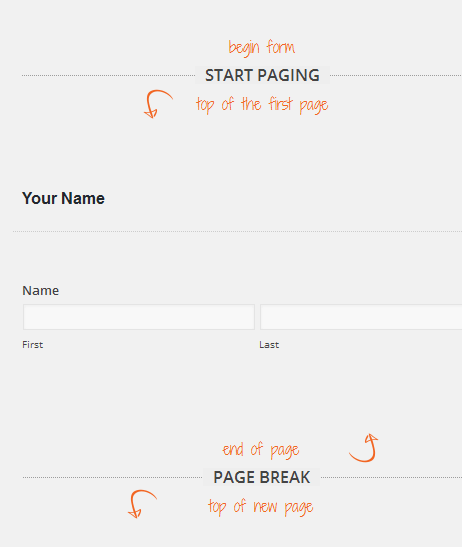
As your user fills in the form, they will be guided from section to section and a progress bar will show them how much of the form has been completed.
So you can see that you can create some beautiful forms using Gravity Forms that shows progress and allows conditional logic.
In Summary
In Part One of our Gravity Forms Series, you learned to to install the Gravity Forms plugin and create your first form.
In Part Two, you learned how to add your form to a post or page and how to style your Gravity Forms by applying custom CSS.
You also learned how to add section breaks and page breaks to help guide your user during the data collection process.
In Part Three we’ll review some Gravity Forms advanced topics such as how to prevent spam, redirect your visitor to PayPal, and troubleshoot email notifications.
Image Credit: Fotolia